
As a young crafter I always loved working with inks paints and other weird materials. I love the artistic, anything can happen look inks can give a project. It’s hard to know how ink will re-act initially when you start working with a new product – and for that reason I love experimenting with it. There are many different kinds of inks available on the market today – they have grown in popularity as more and more crafters start to create their own artistic elements instead of using the pre-manufactured goods. Artistic and handmade is the new in thing ladies! Today we are playing with Mister Huey’s Colour Mist *Love*.
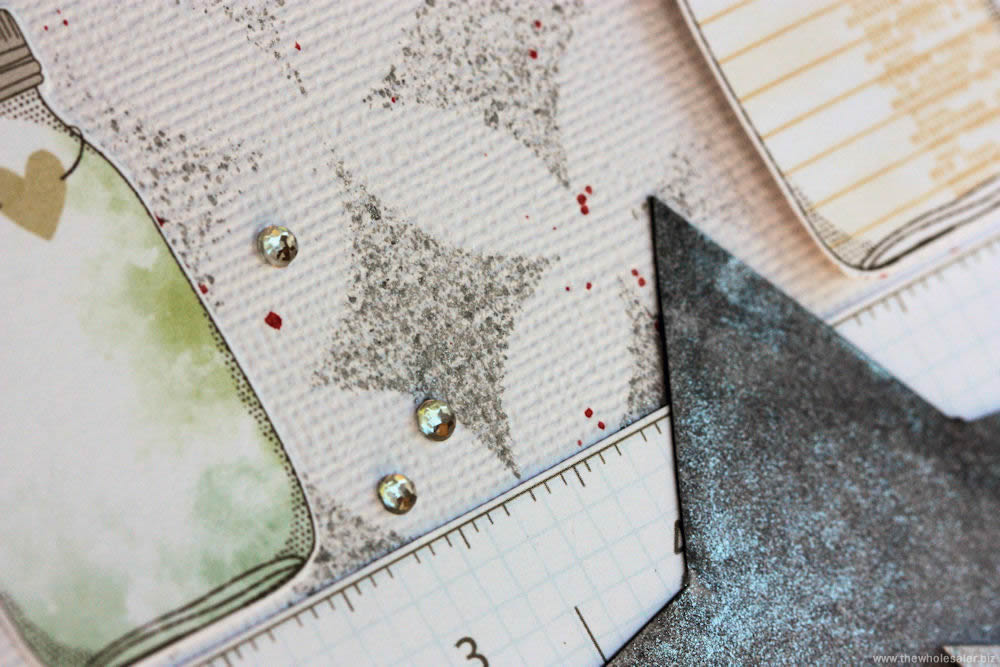
For my layout I used Mister Huey’s Ink in 3 subtle ways. I love using techniques on my layouts but like everything in life and in design the key is to know when it works. I use techniques in little subtle and interesting ways – ways that will enhance my layout and still let the focus be on my photos and the story I am telling. So for my layout I used 3 different Mister Huey’s colours and created coloured splats on my background, then I used silver Mister Huey’s together with a stencil and created a pattern on my background and lastly I used the silver to mist my cut out stars for beautiful handmade elements. On the smaller stars I used the nozzle to draw squiggles on the stars after the first layer of ink was dry. I love how it turned out.
The facts
Studio Calico Mister Huey’s Colour Mist is a rich, translucent colour. It is also available in Opaque White, Silver and Gold. This means that it is not a dye ink in the traditional sense, when you spray it onto something like book paper the writing still shows through the ink.

The evidence
To give you a glimpse into the different effects you will get from the inks on different surfaces I have done a couple of samples for you. I used a combination of Commercial papers, which means papers normally used for business stationary or wedding invitations, as well as some scrapbooking papers normally used by scrapbookers and paper crafters. I used the inks directly and sprayed the inks 3 colours onto each sample and then lightly misted it with water – here’s what happened…

[custom_list type=”dot”]
-
Canvas

The canvas takes ink really well. I used a primed canvas piece so the ink sat really well on the surface and the water blended the colours together for a beautiful flawless artistic look. Notice how the ink colours became lighter on this surface.
[custom_list type=”dot”]
-
Glossy Commercial Printable Paper
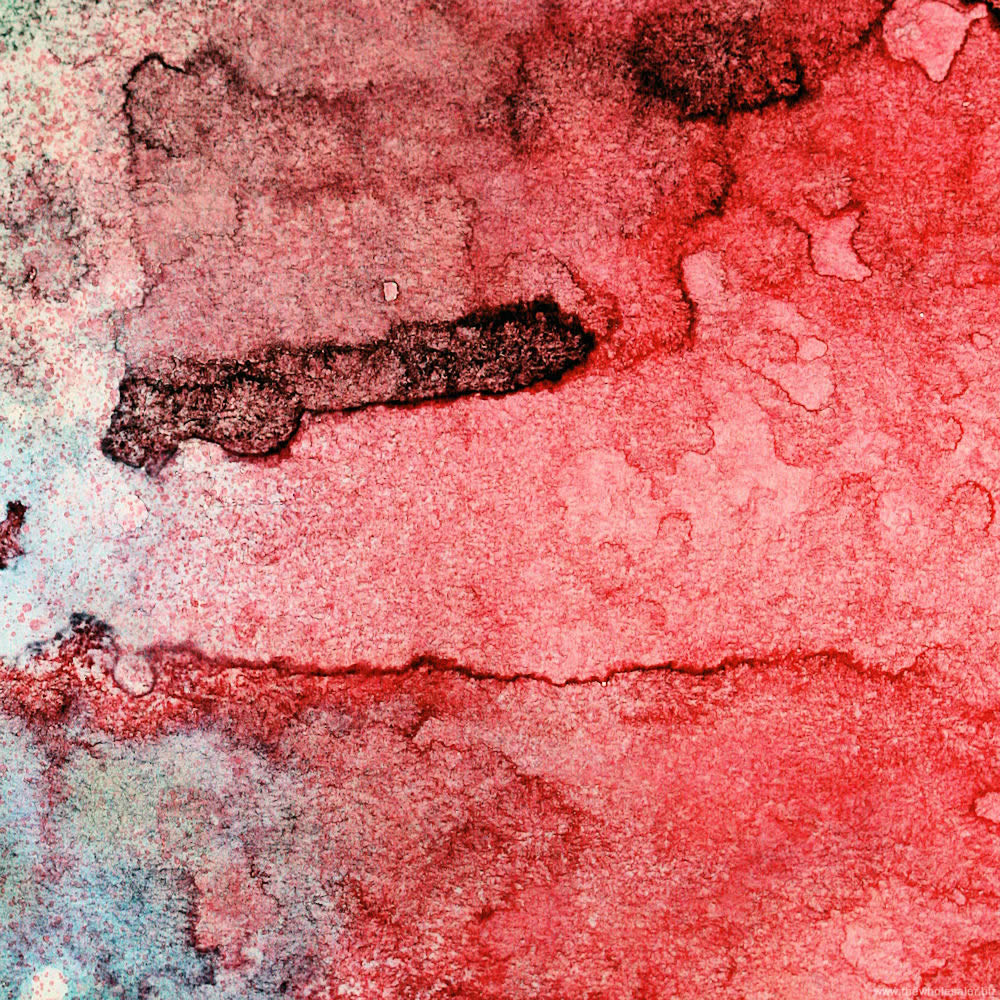
This paper is normally used for laser printing or industrial printing of leaflets. It’s a great paper that can be used for techniques using inks and ink pads. I love the look the inks created on this piece. I left all of the inks to dry naturally, but as the inks ran on this piece the ink grouped together and formed really interesting effects. The inks dried fairly quickly.
[custom_list type=”dot”]
-
Glossy Photo Paper
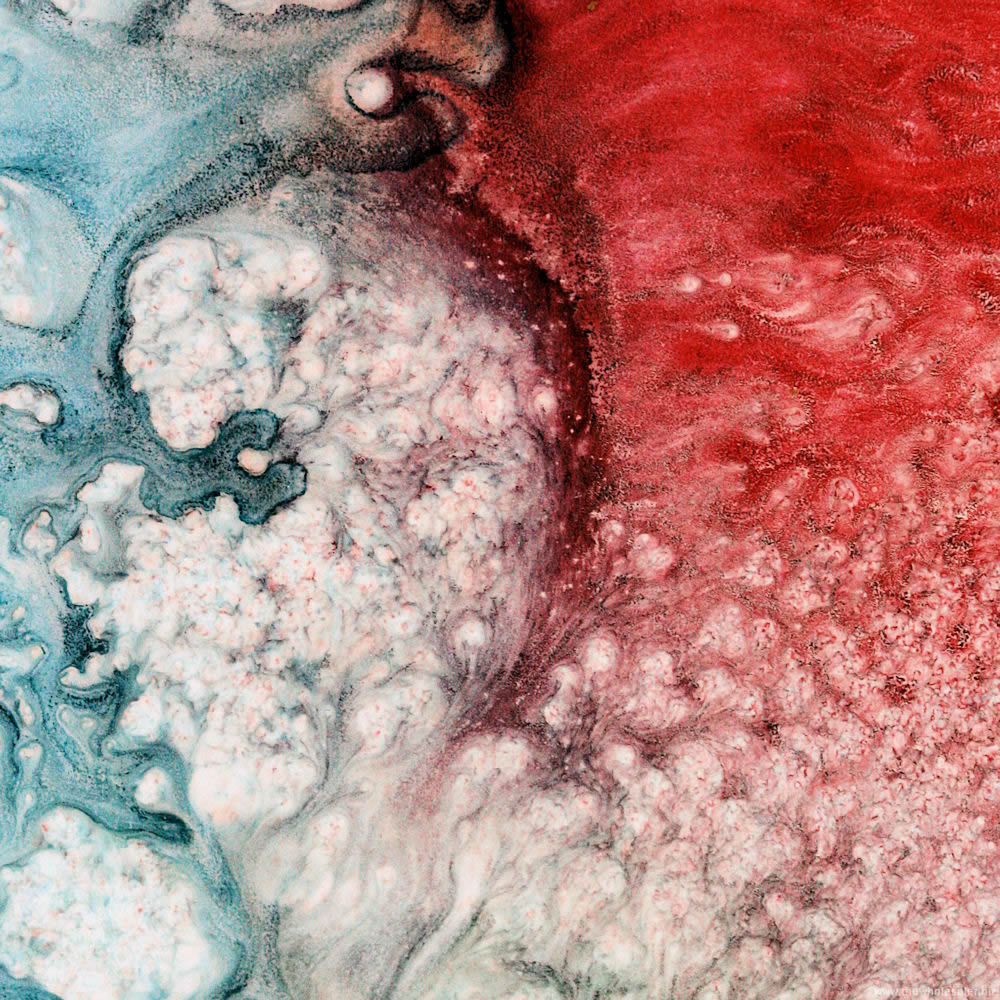
The inks sat on the photo paper and even after a light water mist the ink did not blend together. Each colour of ink sat in its own corner with the touching edges creating beautiful and artistic lines to separate each colour. The ink took overnight to dry and was still tacky even a day after it dried. 2 days later the ink was dry to the touch.
[custom_list type=”dot”]
-
Commercial Wedding Invitation Cardstock

This cardstock is white with a beautiful pearly sheen to it. It is heavyweight and the inks loved this surface. It blended well but took on a different finishing look than all the other glossy papers. The ink had a shiny look to it afterwards which was really nice.
[custom_list type=”dot”]
-
Smooth White Cardstock with a high fibre/cotton content

This cardstock has a high fibre content which means that it doesn’t really like water that much. After misting the ink and then the water, the ink almost totally disappeared into the cardstock and the water created a wet paper look. Not a bad result but not the sort of look I am looking for. The ink also became very light as it air dried.
[custom_list type=”dot”]
-
Smooth White Cardstock with a low fibre/cotton content

This is the cardstock I love working with the most. It is smooth so it works really well for stamping and inks. The ink keeps it vibrant hues but also blends really well. Even after adding water to it, it dries perfectly without any water marks left behind. When ink is left to dry in large amounts on this paper it will create beautiful artistic elements.
[custom_list type=”dot”]
-
American Crafts Textured Cardstock

This is a piece of AC Cardstock I had embossed through the Cuttlebug. I am not fond of the look of the ink on this cardstock. Although when I added water and the ink mixed together, the end result was really cool. I don’t like adding water to this type of cardstock for my own personal reasons. The ink colours did fade a bit as it dried.
[custom_list type=”dot”]
-
Book Paper

I used a single colour and lightly misted once onto the book paper and let it dry naturally. I love this effect and the paper can be embossed in the Cuttlebug or die-cut into letters and shapes for a unique look.
These are just a few types of papers used to establish the different effects achieved after misting them with Mister Huey’s Colour Mist. The ideal paper then you may ask – whatever look you like and want to achieve. It’s a personal choice as is everything in the world of crafting.
I hope you have a better insight into the world of inks as they react on the different surfaces. The best thing is to experiment. And remember different colours will also give a different look on different surfaces.
Products Used
- Mister Huey’s Colour Mist – Leaf Green [AC 331046]
- Mister Huey’s Colour Mist – Silver [AC 331079]
- Mister Huey’s Colour Mist – Water Cooler (Aqua) [AC 331019]
- Mister Huey’s Colour Mist – Sunshine [AC 331080]
- AC Studio Calico Heyday Paper Pack 6×6
- AC Dear Lizzie Neapolitan Paper Pad 6×6
- AC Cardstock (12×12 Textured) – White [AC NEUTRALS 71081]
- Cuttlebug Machine [PC 2000293]


4 Comments.
Can’t you do ‘n project with the Artiste markers? Please, please, please.
Hello Sanet,
Jowilna has done a couple of project using the Artiste Dual Tip Brush Markers, I’ll list the links hereunder.
But maybe you could let us know if there is something a little more specific that you would like to know about? I’m sure Jowilna would have the correct answer if we simply ask! She rocks like that you know :)
Projects using Artiste Markers:
– A docrafts Christmas Easel Card
– Mr Cool – Boofle Greeting Cards
– Glamorous Cards Art Deco Style
– National Braai Day
Wow awesome examples to show the different effects. I think I’m always to scared to try in case I mess up… but soon I will jump off the deep end and experiment.
I will definitely do some more things using the Artiste Markers Sanet – so watch this space!
And remember the only way to know how things will react is to try them on different surfaces – this is how all the great techniques are discovered.The reason i love working with paper and inks – if you make a mistake turn it into something else, or simply use the back of the paper – really simple stuff!
enjoy your inks!