
So you’ve pretty much used your Silhouette for anything and everything, and hopefully by now you have mastered some of the most important functions. And now is the time to play and have fun!
I used one of my backgrounds I purchased to create a background for a card. I love how you can simply change the size of your cut image to fit any project. No more using pretty patterned papers for my cards – I think I am hooked on the versatility of using these cut backgrounds on my cards, and I can custom cut them in any colour paper I want or need.

Here’s how I went about it
-
Step 1
open the background from your Library

-
Step 2
resize the image – remember to hold down the “Shift” key so that it will resize proportionally. I just work on the sizing and because the image Is measured in inches I can easily see if it will fit my card front

-
Step 3
send your file to the Silhouette to cut. Remember to loads your cutting material by following the on screen prompts on your CAMEO

-
Step 4
cut your background using your material of choice. I used my favourite cutting cardstock, American Crafts smooth cardstock

-
Step 5
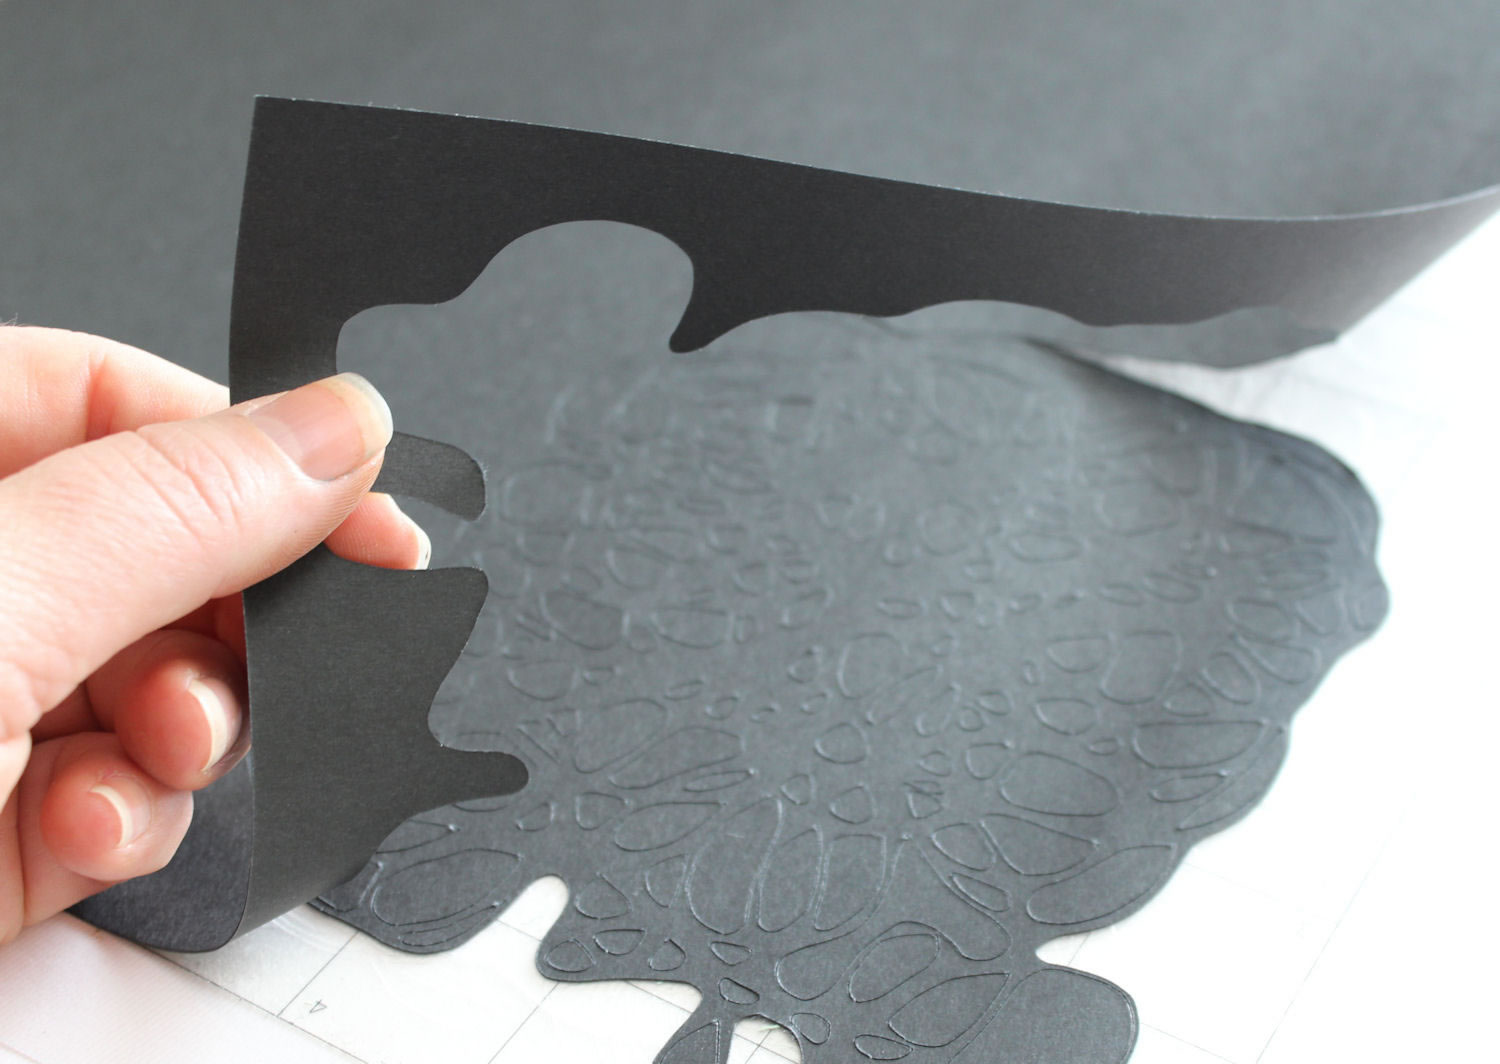
I start by peeling off the outside piece of cardstock leaving behind only the cut background part
-
Step 6
next I use my Spatula to carefully remove the cut image and all of the parts on the inside. I really like this tool because I can remove small as well as large piece of cardstock easily without damaging the delicate cut lines

Once my image was cut and removed from my cutting matt, I adhere it to the front of my card and trimmed off any overhanging bits using my scissors. Make sure that all the bits are glued down really well to avoid them lifting after you cut the edges off. I recommend using a spray glue to make things easier.

[box type=”info”]
Did you? A life changing tip I learned the hard way!
So you’ve unpacked your Silhouette and the box and all its bits are kept safely together, or so you think. That is until you want to change the blade settings. Apparently that little grey cap is quite an important part of the machine and whole cutting process – who new, until it was a bit late?
So as organized as I am, I couldn’t find the cap anywhere under the piles of in-progress stuff on my desk.

Never fear because there is always someone with a solution – so phone a friend and here’s what I learned. You know the little hole on the left side of the CAMEO, the hole where you are meant to store your blade, the same blade you sometimes will have to change the settings with and just can’t do by hand and simply turning it, yes that hole.

Well afore mentioned hole can also help you adjust the blade: simply insert the blade and turn to adjust – genius right! Right!
And after all of that, I lift a pile and there is that little grey sucker! Some useless information for those who knew, but if you didn’t, then thanks a bunch to my friend for sharing that info – that saved my life!

Happy cutting Silhouette CAMEO Backgrounds and card making with your new best friend!
Products Used


8 Comments.
Wow, what a machine………..the problem is just who is going to do the teaching in my area?? Thinking seriously to buy one……..
Love all the tips and wish I knew about the hole for the blade adjustment sooner. I was caught out and had to spend money on a 2nd blade coz I threw that little grey piece away. HAHAHAHA…..
Have you seen the tutorials and tips on our blog? http://bit.ly/Silhouette-Archive We are in the process of filling that space with much more! Keep your eyes on this space…
Many of the retail stores will be offering classes. I would recommend that you contact your favourite store and ask them about classes in your area. If they can note help you, maybe take a look at the store locator and contact some of the other stores in your area: CAMEO. http://bit.ly/craft-stores
can the Silhouette Cameo work for me as i do wedding cards.
Hi Belinda,
Oh yes! The CAMEO is a wonderful tool for all types of card making. So many people use the Silhouette for wedding invitations, card, place markers and much more! Please take a look at this page, it gives you more information about the Silhouette CAMEO and has a lovely video too. Click here: http://bit.ly/Silhouette-CAMEO
Hope this helps :)
What is the name of the background you bought from the cameo silhouette which you used in this tutorial?
Hi Mariana – the background I used on my card is called
light and shadows lace
http://www.silhouettedesignstore.com/?page=view-shape&id=65920
So glad you girls are loving the machine – I am addicted at the moment and can’t imagine life without it!
Happy cutting!
Jowilna
PS> The circle element i used on my card was a free download a few weeks ago! Remember to check back weekly to grab your free download of the week from the Silhouette store!
Jowilna